
 An instant hot water tap is one of those upgrades that makes daily life way more convenient. With one installed, I get access to near-boiling water on demand, which is perfect for tea, coffee, cleaning, and even speeding up meals. If you’ve ever thought about fitting one yourself, this guide covers everything I wish I’d known before I got started. I’ll walk you through planning, picking the right tap, the actual installation, and simple ways to keep it working smoothly afterward.
Getting this right can save you time and even some money, but it’s really important to think things through before grabbing your toolbox. I’ve learned that with a little preparation, anyone with reasonable DIY skills can install an instant hot water tap. Knowing exactly what to expect makes the job much less stressful.
In this guide, you’ll find a clear step-by-step approach from start to finish, so you can enjoy piping hot water whenever you want, without paying a plumber.
Step 1: Make Sure an Instant Hot Water Tap Suits Your Kitchen
Not every kitchen is set up the same way, and not all taps work in every space. Before buying anything, I always check that my counter layout and cupboard space are ready. Instant hot water taps need an electrical outlet under the sink and space to fit a small tank.
Things I Check Before Buying:
- Do I have a free power outlet under my sink?
- Is there enough cupboard space for the hot water tank (usually about the size of a toaster or small kettle)?
- Can my worktop fit a new tap, or will I need to replace or modify anything?
- Is my water pressure consistent and strong enough for the system (most brands need at least 1 bar)?
Getting answers to these questions helps me avoid surprises once I start the install. It’s also wise to measure your available space, making note of any existing pipes or obstructions inside your cupboards. If your under-sink area is already crowded with cleaning supplies or plumbing, clear it out so you’ll have an easier time when it’s time to fit the tank later.
Step 2: Choose the Right Instant Hot Water Tap
With so many styles and options out there, picking the best instant hot water tap for my kitchen didn’t come down to just looks. I wanted something reliable and safe. I always make sure to check:
- Temperature Control: Some models have adjustable temperature so I can set it right where I want it.
- Child Safety Features: Since these taps deliver nearly boiling water, I look for models with safety buttons or handles.
- Water Filtering: Some brands come with built-in filters that reduce limescale and make the water taste better.
- Tank Capacity: If I make lots of hot drinks or have a big family, a bigger tank makes more sense.
- Power Consumption: I check the label for energy usage. Most tanks use about 1.5–2 kWh to keep water hot all day.
Careful research helps buyers make informed decisions about which features matter most to them. I usually read recent user reviews and check sites like Which? or Good Housekeeping to see how brands perform long-term. The Water Filter Men has a helpful guide on features to compare.
Another factor is whether you want a hot water tap that’s combined with your regular cold tap or a standalone option. Combination taps save space but may be more complicated to fit, while standalone models are perfect if you want a quick, minimal hassle upgrade. Budget is a consideration too, as models with filtration and advanced safety features can cost more upfront, though they provide extra benefits over time.
Step 3: Gather Tools and Supplies
I get everything ready before I start. Here’s what I use:
- Adjustable wrench
- Screwdrivers
- Drill and hole saw (if installing in a new location)
- Measuring tape
- Work gloves and safety glasses
- Plumber’s tape
- Bucket and towels (for spills)
- The tap and tank kit (with included hoses, adapters, and fittings)
Most brands provide a detailed instruction manual, but I always find it helps to watch a few installation videos on YouTube for specific models, just to be safe. Have all tools laid out before you begin, and carefully read through the instructions from start to finish. Position any pets or children away from the workspace, and lay towels to catch any expected water drips.
Step 4: Remove the Old Tap or Prep the Worktop
If I’m replacing an existing tap, I turn off the water supply, then run the tap until no water comes out. I use an adjustable wrench to undo the water pipes, loosen the mounting nuts, and remove the old tap. If I’m adding a brand new tap as an extra, I drill a hole in the worktop or sink following the manufacturer’s size instructions, usually about 35mm wide.
Tips:
- Measure twice before drilling. A misplaced hole can’t be undone!
- If my worktop is stone or granite, I call a professional to avoid cracks or chips.
Allow extra time for older setups that may have seized nuts or fragile plumbing. Before making changes to solid surface countertops, test fit the tap and tank, and mark out all measurements clearly. If you have a template included with your tap, trace it accurately before drilling.
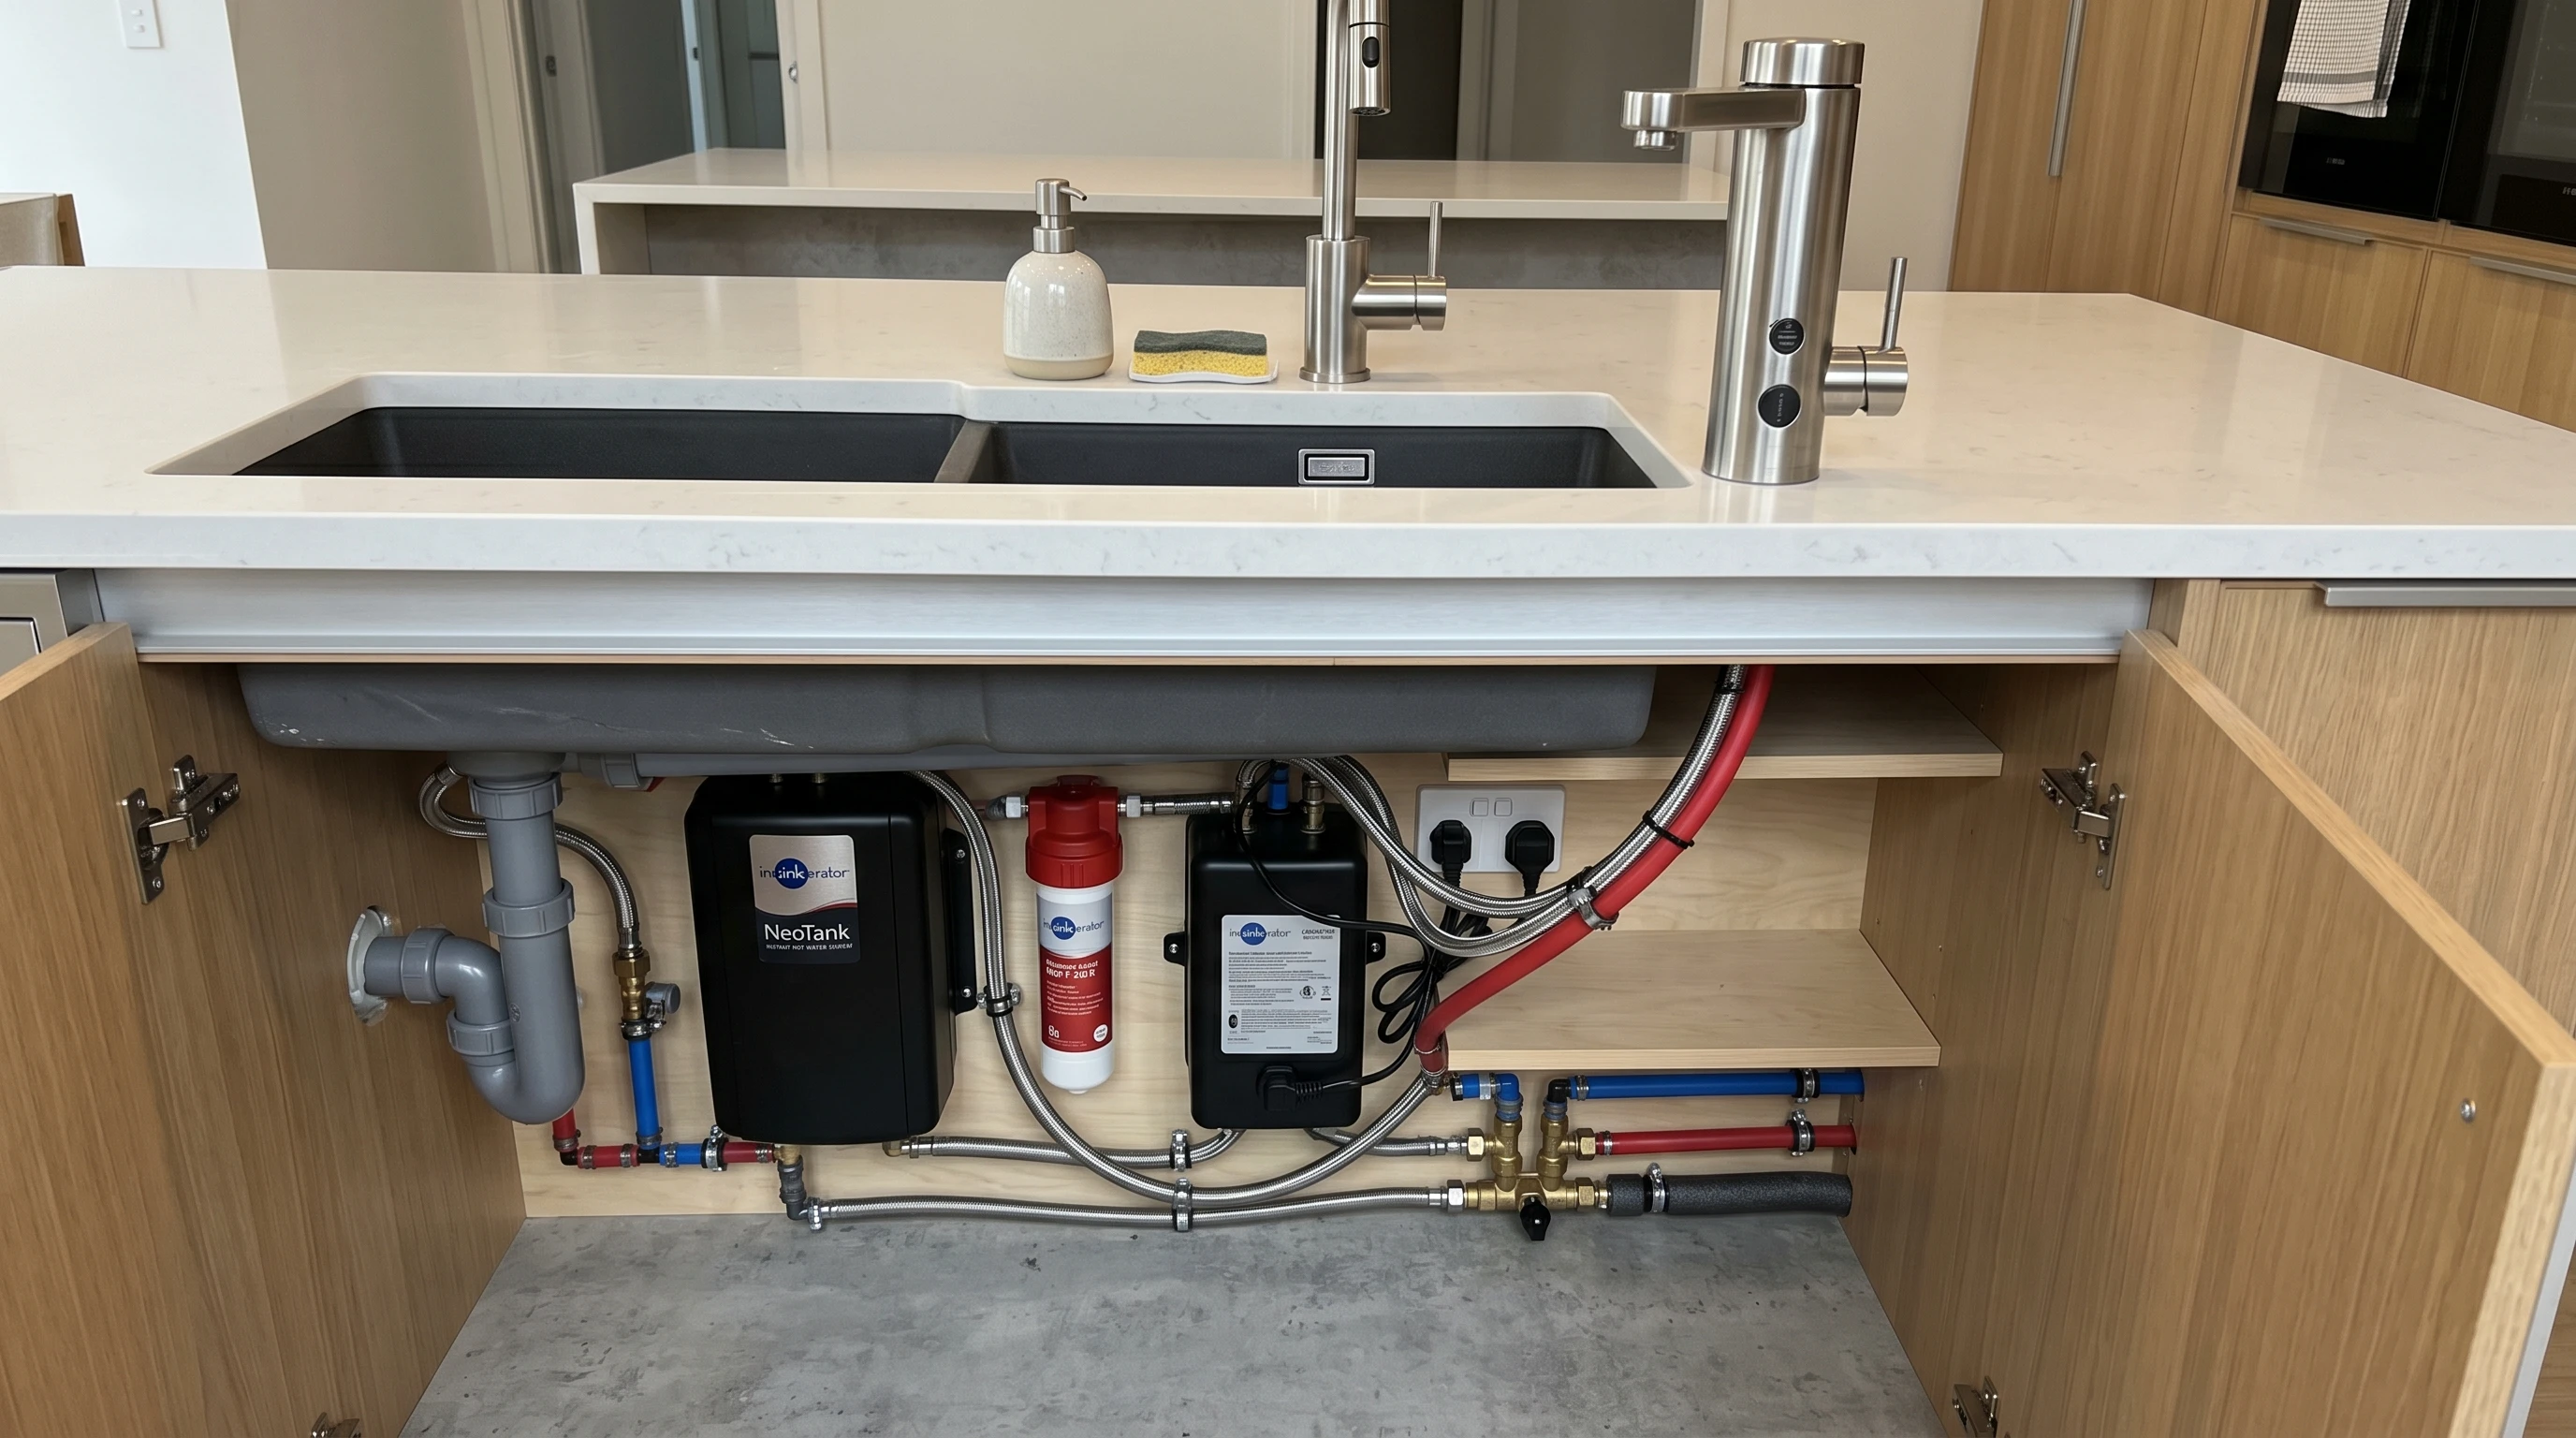
Step 5: Install the Hot Water Tank and Tap
Installing the tap itself is usually a straightforward job. Here’s how it usually goes:
- Insert the new tap into the hole. I make sure the base plate is secure and the tap is properly aligned before tightening the mounting nut underneath.
- Attach the provided hoses to the tap and tank, following the manufacturer’s labelling (hot, cold, filtered, etc.). Each hose usually only fits in its correct spot, but I double-check the diagram just to be sure.
- Install the hot water tank vertically, ideally close to the tap for the shortest hose runs. I usually set it to the side to leave access to the rest of my storage under the sink.
- Connect the water supply line to the tank, making sure to use plumber’s tape for leak-free seals.
- Connect the tank’s power cord to the nearest outlet, making sure the socket is not overloaded by other major appliances.
I’ve found that most leaks happen where the hoses meet the tank or tap, so I tighten everything firmly but carefully. Once all the plumbing is hooked up, I very slowly turn the water supply back on and check every connection for drips. If there’s a slow leak, tightening the fitting gradually usually does the trick. Never overtighten, as this could damage threads or crack plastic fittings.
Step 6: Test the System and Set Temperatures
Once there are no leaks, I plug in the hot water tank and let it fill. After a couple of minutes, it will heat the water to the set temperature. I run the tap and make sure hot water flows steadily. Some models need 10–15 minutes for the first heat-up.
If my tap has adjustable temperature settings, I check the manual for recommended limits, usually around 98°C for safety. Setting the temperature too high can cause spitting or more limescale, so I stick to the manufacturer’s guidance. After testing, I wipe away any water spills and reset the cupboard contents as needed.
Care and Maintenance
Instant hot water taps stay reliable with just a little upkeep. I always do the following:
- Descale the tank and tap every 3–6 months in hard water areas using food-safe de-scaler. Following the manufacturer’s decalcifying schedule helps avoid breakdowns.
- Replace built-in water filters as recommended, usually every 6 months.
- Wipe the tap after use to avoid limescale build-up around the spout.
- Check for leaks or drips every month, tightening connections if needed.
Keeping up with these simple routines means I avoid most common problems and get years of use out of the system. For more in-depth tips, the Which? guide to tap maintenance is really useful. If you notice changes in the water taste or reduced flow, address them promptly by changing filters or checking hose connections.
It’s good to mark your calendar for routine maintenance. If you live in an area with very hard water, you might need to descale more often. Sticking to the manufacturer’s suggested care keeps your warranty intact and your tap running smoothly.
Common Questions & Troubleshooting
What if the tap splutters or spits?
This often happens when air is trapped in the system, or if the tank is set above the recommended temperature. Running the tap for a few minutes usually clears air. I keep the tank at or below the manufacturer’s recommended temperature for smooth flow.
What if my water tastes odd after installation?
- New tanks or hoses might need to be flushed out; run hot water for 5–10 minutes to clear this up.
- If the taste remains, I check (or replace) the filter.
Is a plumber or electrician necessary?
If a new electrical socket or extra plumbing is required, I always use a qualified professional for safety. For direct plugin and straightforward tap swaps, most people with DIY skills can do the work themselves. If in doubt, I seek expert help. Water and electricity are not something to guess at.
If your new tap doesn’t turn on or the indicator lights don’t work, double-check that the power cable is plugged in securely and the circuit isn’t tripped. For water leaks after installation, check each joint and fitting, and tighten or reapply plumber’s tape as needed.
Wrapping Up & Next Steps
Installing an instant hot water tap is a solid project if you want daily convenience and a bit of a kitchen upgrade. After fitting mine, I found myself using it much more than expected, for cooking, hot drinks, and quick cleaning. Staying organized, reading the instructions, and double-checking all fittings made my installation stress-free and satisfying.
Remember to recycle any old taps or packaging materials responsibly. When you’re finished, tidy your workspace so you can enjoy your kitchen’s new addition to the fullest.
My Simple Action Plan:
- Decide where the tank and tap will fit, and check for power and space.
- Choose a model with the features and tank size that suit my needs.
- Set aside a free afternoon for installation, including time for slow, careful connections.
- Keep up with basic maintenance to keep the system working well.
Once you’ve installed your own instant hot water tap, you’ll probably wonder how you got by without one. I’d love to hear which brand you’re considering or your experience with installation in the comments below! Installing one yourself isn’t as tough as it looks—just stay patient, work methodically, and soon you’ll have speedy hot water at your fingertips.